- Home
- Products
- Hardness Testing
- Hardness Testers
- Load Cell Closed Loop Brinell Hardness Tester EW-3000
If you want to find out more about
Load Cell Closed Loop Brinell Hardness Tester EW-3000
Talk to us at :
(65) 6749 9697

sales@lfc.com.sg
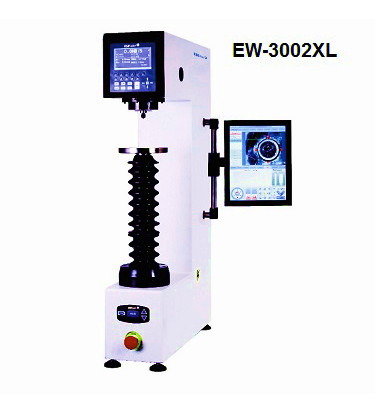
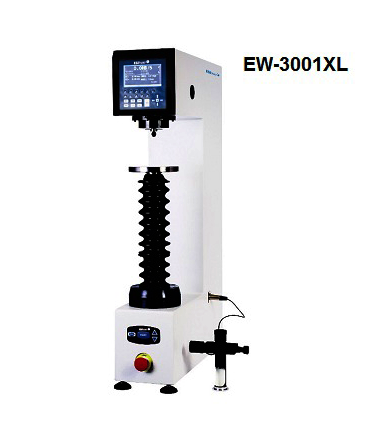
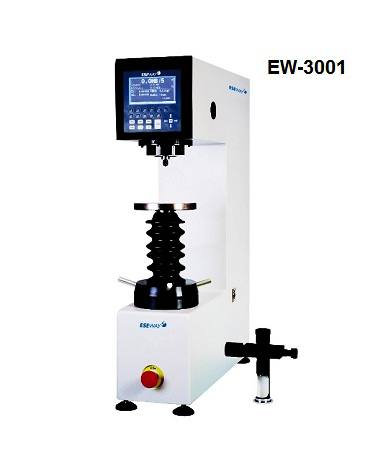
By investing on Eseway Digital Hardness Tester EW-3000, you can simplify hardness measurement of both Brinell scale and Vicker scale. Eseway Digital Hardness Tester EW-3000 is devised ready-to-test digitally with closed loop controlled from a load cell system to measure toughness of a material and the maximum amount of energy it can absorb before fracturing. Eseway Digital Hardness Tester EW-3000 provide innovative approach in streamlining your application within its loads 30kgf - 3000kgf. The indentation hardness of materials can be characterized through the scale of penetration of an indenter, loaded on a material test-piece. Conversion to either hardness scales and real-time statistics can also be done. This instruments also offered with INV-Impression system which includes: high performance PC- based camera indent measuring system, automatic measurement of the indent on the LCD screen. When doing the hardness tests, the minimum distance between indentations and the distance from the indentation to the edge of the specimen must be taken into account to avoid interaction between the work-hardened regions and effects of the edge. These minimum distances are oftenly distinctive for ISO 6507-1 and ASTM E384 standards. Hence, to minimize the risk of human error in testing, the connectivity for data output via RS-232 is needed to allow you review those data directly or simply store, file, handle images on the PC for future reference. Overall, Eseway Digital Hardness Tester EW-3000 is versatile and reasonably priced. Currently, this intrument is widely used by fabricators in defense industry, tool-making, optics, petrology and mineral, aerospace engineering. However, if you are looking for a basic Brinell tester, you migth want to consider CV instruments CV-3000LDB Hardness Tester. Eseway Digital Hardness Tester EW-3000 Features: Load cell, closed loop system Test loads 30kgf - 3000kgf Connectivity for data output via RS-232 allows you to store, file, handle images and data on the hard disk. German-made optical system with high quality objectives and either analogue or digital reading microscopes. LCD display showing Brinell and Vickers value, statistics and tester settings Simultaneous conversion to Rockwell, Vickers, Brinell and Leeb rebound testing Microscope with analogue scale for indentation measurement (EW-3001 model) Digital microscope for automatic indentation measurement (EW-3002 model) Standard supplied with objectives for 10x, 25x and 100x magnification Brinell video microscope system (optional) Brinell INV-IMPRESSIONS automatic indent measuring and filing system XL version, 450mm workpiece height, 250mm throat depth Delivered On Stock Unit: Eseway Digital Hardness Tester EW-3000 Unit Analogue microscope with 10x, 25x and 100x magnification (EW-3001) Digital microscope with 10x, 25x and 100x magnification (EW-3002) for automatic measurement Ball indenters ø 1mm, ø 2.5mm, ø 5mm and ø 10mm V-anvil ø 80mm Large flat anvil ø 200mm Fuse 2A (3 pcs) Hardness test block 150-250 HBW 10/3000 Hardness test block 75-125 HBW 10/1000 Hardness test block 150-250 HBW2.5/187.5 RS-232 data output 4 adjustable feet ESEWAY® certificate with installation and user manual Optional accessories: Motorised spindle for fully automatic testing on XL models Large testing table 350mm x 250mm HB100 Video measuring and database system Extended height/width frame XL models Motorised X-Y stage Indenters & hardness test blocks Certified indenters & blocks Solid tester table & storage cabinet
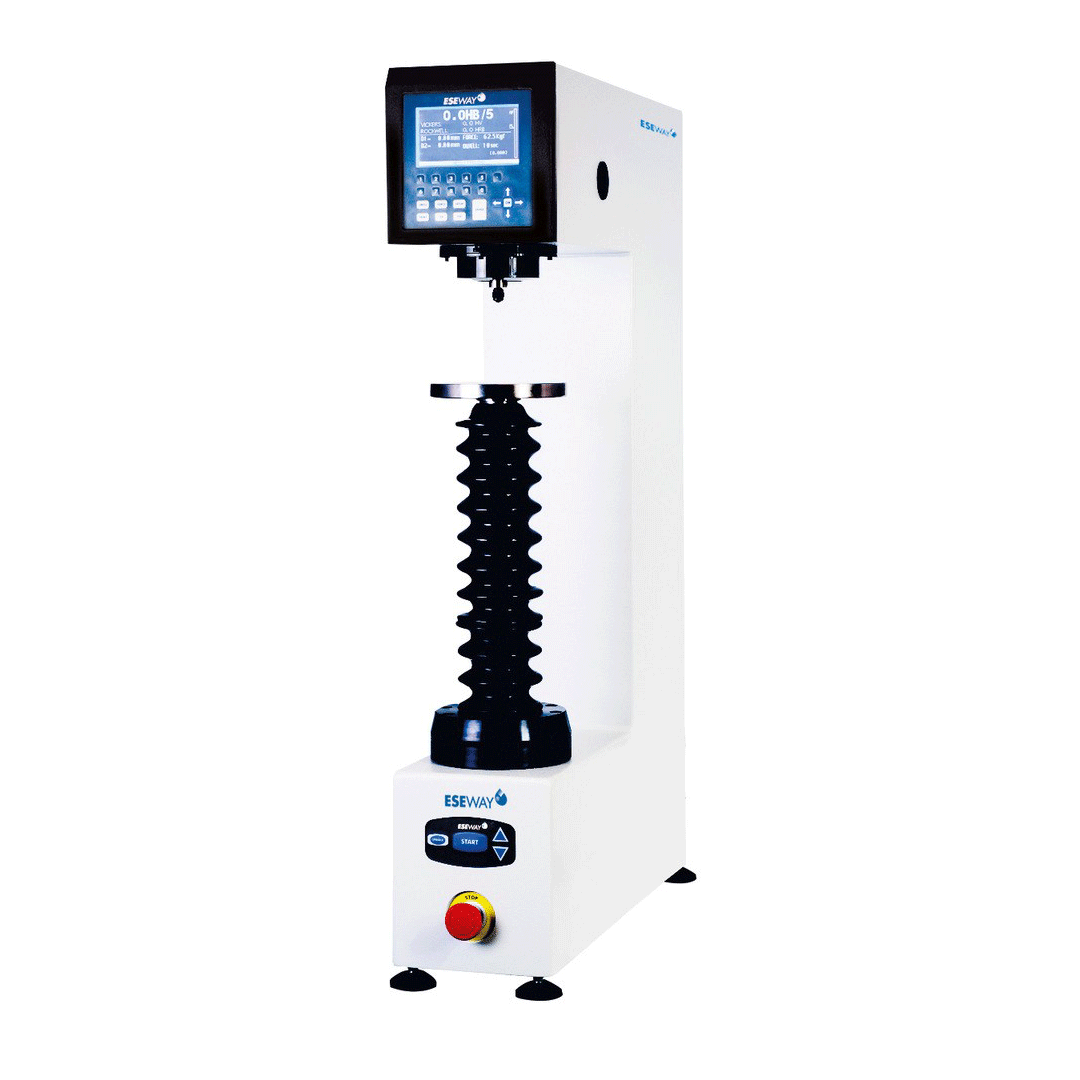
By investing on Eseway Digital Hardness Tester EW-3000, you can simplify hardness measurement of both Brinell scale and Vicker scale. Eseway Digital Hardness Tester EW-3000 is devised ready-to-test digitally with closed loop controlled from a load cell system to measure toughness of a material and the maximum amount of energy it can absorb before fracturing.
Eseway Digital Hardness Tester EW-3000 provide innovative approach in streamlining your application within its loads 30kgf - 3000kgf. The indentation hardness of materials can be characterized through the scale of penetration of an indenter, loaded on a material test-piece. Conversion to either hardness scales and real-time statistics can also be done. This instruments also offered with INV-Impression system which includes: high performance PC- based camera indent measuring system, automatic measurement of the indent on the LCD screen.
When doing the hardness tests, the minimum distance between indentations and the distance from the indentation to the edge of the specimen must be taken into account to avoid interaction between the work-hardened regions and effects of the edge. These minimum distances are oftenly distinctive for ISO 6507-1 and ASTM E384 standards. Hence, to minimize the risk of human error in testing, the connectivity for data output via RS-232 is needed to allow you review those data directly or simply store, file, handle images on the PC for future reference.
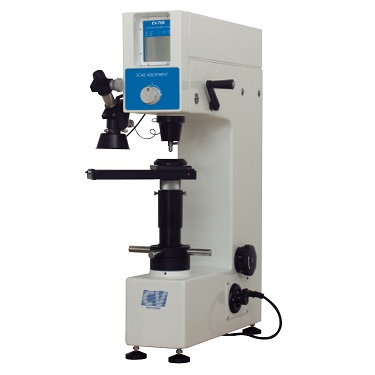
Overall, Eseway Digital Hardness Tester EW-3000 is versatile and reasonably priced. Currently, this intrument is widely used by fabricators in defense industry, tool-making, optics, petrology and mineral, aerospace engineering. However, if you are looking for a basic Brinell tester, you migth want to consider CV instruments CV-3000LDB Hardness Tester.
Eseway Digital Hardness Tester EW-3000 Features:
- Load cell, closed loop system
- Test loads 30kgf - 3000kgf
- Connectivity for data output via RS-232 allows you to store, file, handle images and data on the hard disk.
- German-made optical system with high quality objectives and either analogue or digital reading microscopes.
- LCD display showing Brinell and Vickers value, statistics and tester settings
- Simultaneous conversion to Rockwell, Vickers, Brinell and Leeb rebound testing
- Microscope with analogue scale for indentation measurement (EW-3001 model)
- Digital microscope for automatic indentation measurement (EW-3002 model)
- Standard supplied with objectives for 10x, 25x and 100x magnification
- Brinell video microscope system (optional)
- Brinell INV-IMPRESSIONS automatic indent measuring and filing system
- XL version, 450mm workpiece height, 250mm throat depth
Delivered On Stock Unit:
- Eseway Digital Hardness Tester EW-3000 Unit
- Analogue microscope with 10x, 25x and 100x magnification (EW-3001)
- Digital microscope with 10x, 25x and 100x magnification (EW-3002) for automatic measurement
- Ball indenters ø 1mm, ø 2.5mm, ø 5mm and ø 10mm
- V-anvil ø 80mm
- Large flat anvil ø 200mm
- Fuse 2A (3 pcs)
- Hardness test block 150-250 HBW 10/3000
- Hardness test block 75-125 HBW 10/1000
- Hardness test block 150-250 HBW2.5/187.5
- RS-232 data output
- 4 adjustable feet
- ESEWAY® certificate with installation and user manual
Optional accessories:
- Motorised spindle for fully automatic testing on XL models
- Large testing table 350mm x 250mm
- HB100 Video measuring and database system
- Extended height/width frame XL models
- Motorised X-Y stage
- Indenters & hardness test blocks
- Certified indenters & blocks
- Solid tester table & storage cabinet
Overview
Built to last

Original Bowers precision engineers and tool factory established in Bradford in 1915. Bowers group are now manufacturing industrial excellence from around the globe to ensure reliability and values to support you in the field of precision measurement.
Customer value

Eseway Digital Hardness Tester EW-3000 Series are reflecting Bowers' ethos of accuracy, quality, ease and reasonable into comprehensive range of gauges. Eseway Digital Hardness Tester EW-3000 is trusted by engineers world-wide and covered with 1 year limited warranty
TECHNICAL SPECIFICATION
CV instruments Brinell Hardness Tester CV-3000LDB Ordering Guide:
Notes: When quoting a Brinell hardness number (BHN or more commonly HB), the conditions of the test used to obtain the number must be specified. The standard format for specifying tests can be seen in the example "HBW 10/3000". "HBW" means that a tungsten carbide (from the chemical symbol for tungsten or from the Swedish/German name for tungsten, "Wolfram") ball indenter was used, as opposed to "HBS", which means a hardened steel ball. The "10" is the ball diameter in millimeters. The "3000" is the force in kilograms force. Be advised to get the suitable instruments on your application by simply send your inquiry to us |
| Brinell scale HB | 31.25, 62.5, 100, 125, 187.5, 250, 500, 750, 1000, 1500, 3000kgf |
| Vickers HV | 30, 40, 50, 60, 80, 100, 120kgf |
| Ball indenters | 10, 5, 2.5, 1mm |
| Test force selection | Electronic, closed loop, load cell, force feedback system, indication in kgf or N |
| Test procedure | Automatic, loading/dwell/unloading |
| Loading speed | Variable, depending on load application |
| Test force accuracy | < 1% full range |
| User display | Diameter of indent, length of diagonals, hardness value, converted value, test force, online statistics |
| Display resolution | 0.1 HB, HV |
| Hardness conversion | Rockwell, Vickers, Brinell, Leeb & Tensile 2 scales simultaneously |
| Standardisation | N, ISO 6507, EN ISO 6506, ASTM E-10-08, ASTM E-92 |
| Statistics | Total tests, max, min, average, range, standard deviation, all in real time after each test |
| Control panel | Start test, stop test, dwell time, print, clear, menu operation for date, time, scale and load settings, language |
| Firmware | German, English, French (standard) |
| Memory | Large memory for testing results |
| Data output | RS-232, Bi-Directional |
| Loading mechanism | Fully automatic, closed loop, force feedback, loading, dwell, unloading |
| Dwell time setting | Default 10 seconds, user defined 1 to 99 seconds |
| Eyepiece microscope | Analogue or optional bright dual line filar |
| Vertical capacity | 220mm (450mm XL model) |
| Horizontal capacity | 135mm (250mm XL model) from center-line |
| Humidity | 10% to 90% non condensing |
| Machine weight | 130kg (160kg XL model) |
| Power requirements | 100VAC to 240VAC, 50/60Hz, single phase |
| Power consumption | 390W |
Request a Quote
Request A Quote
Please complete the below form to receive further information.


