[Updated 25 September 2023]
What is air gauging?
Air gauging is a non-contact comparative measuring method. It has been used in the industry for more than 80 years. The concept of air gauging is based on the law of physics that states flow and pressure are directly proportionate to clearance and react inversely to each other. Clearance in this case refers to the distance between the nozzle of the air gauge probe and the workpiece. As clearance increases, air flow also increases, and air pressure decreases proportionately. As clearance decreases, air flow also decreases, and air pressure increases.

This is made possible by having a regulated air flow through the nozzle in the air jets of the air gauges. The nozzle acts as a restrictor. As the measured product is brought closer to the nozzle, air flow is reduced, and the back pressure is increased. When the nozzle is completely obstructed, the flow is zero, and the back pressure is equal to the regulated air. Conversely, when the nozzle is open to the atmosphere, air flow is at a maximum, and the back pressure is at a minimum. The pressure differences are then converted electronically to get an accurate dimensional value.
Who Uses Air Gauging?
Air gauging is highly suited for the measurement of soft, highly polished, thin wallet, delicate components that require high accuracy. The smaller the range, the better repeatability, up to a few nanometers. A multitude of features can be measured by air: inside and outside diameters, but also many geometrical features such as taper, flatness, roundness, run-out, squareness, straightness, etc.
As a result, air gauging is used in many industries, they include the following:
- Automotive
- Aeropsace
- Bearings
- Medical
- Molds
- Machinery components
- Packaging
- and many others...
What are the benefits of using air gauging for measurement?
- Ease of use, the operator will not be required to be specially trained to use the equipment
- Operators will not be able to influence the results of the measurement
- Air gauging can be used to measure complex geometric tolerance
- High accuracy and repeatability
- Possible to measure parts without cleaning them first
- Technology particularly well suited to automation
Challenges
While air gauging as a measurement tool offers many advantages, reliable results also depend on crucial external parameters where extra attention is required for it to be successful:
- Air gauge design and quality
- Accuracy of the setting masters
- Air supply control
What can be measured with air gauges?
| Recommended range: | up to 0.15 mm (150 µm), short range better |
| Minimum diameter: | 0.5 mm |
| Maximum diameter: | up to 500 mm (but very rarely since air gauge will be heavy) |
| Display resolution: | up to 0.01 µm (usually 0.1 µm) |
| Max. error: | ˂0.1 µm |
| Theoretical linearity: | Measuring range divided by 80-100 (depending of air gauge) |
| Repeatability: | up to 0.02 µm |
| Display refresh rate: | up to 150 times per second (depending on air jets’ diameter, length of tubes and air gage design/quality) |
| Air pressure: | Precisely regulated at 3 Bar |
Air Gauges & Contact Measurement
Air gauging is sometimes considered as a "non-contact" type of measurement. With air gauging, the measurement point is actually the average area of the surface that the air from the air jets covers. If we were to consider the finish or roughness of the workpiece's surface, the air gauges will measure the average of the peaks and valleys that the air jet is exposed to. This is different from the contact type of measuring instrument, like the bore gauge in this example. It measures on the peaks of the surface only.
1. External diameters
 |
 |
One way external diameters are measured with air gauges is using the ring type air gauge. This is done by inserting the part in an air jet ring gauge. Normally, a guide is used to facilitate the measurement of the components. This is done to prevent the air jet ring gauge from wearing out easily. Air gauges in snap gauges form are also used for manual gauging. It is used to mount into fixtures and for automatic measurement machines.
 |
 |
 |
| Ojiyas Air Jet VC Type | Ojiyas Air Jet LV Type | Ojiyas Air Jet OR Type |
It is also possible to have multiple air jets at various positions for multi-gauging applications. Here are some examples of external diameters types that can be measure with air gauges:
- Ring gauge
- Snap gauge
- Taper
- Multi gauging
- Average diameter
2. Internal diameters
Using air gauges to measure internal diameters is one of the more popular applications. In this instance, the air gauge is usually made with a set of opposed air jets. One of the benefits of using an air gauge to measure internal diameter is that this is independent of how the operator positions the air gauge radially within the components. Thus, using air gauges to measure internal diameters ensure a higher level of repeatability in the measuring process.

The air gauges can be used to measure diameters as small as 1 mm and as big as 87 mm. They can be fabricated with multiple air jets at different levels for a multi gauging application. Average diameter can also be measured with air gauges. This is done by having multiple air jets equally located around the circumference of the air gauge to allow for average size measurement.
 |
 |
Below is a list of internal diameters air gauges can help to measure:
- Plug gauge
- Taper
- Multi gauging
- Average diameter
- Roundness
- Flatness
- Straightness
- Squareness
- Parallelism
- Concentricity
 |
 |
 |
 |
3. Combination of measurements
The air gauge can also be used for measuring parts at multiple points and dimensions. This can be achieved either by using displays with multiple channels, like the D70A. Another way we can do this is by using a modular display system. The Sylvac D400S can be combined with multiple M-Bus units to make measurements at different points of a workpiece.

The air gauge combines the measurement of several elements - ie diameters, depths, angles, etc.
 |
 |
 |
| Ojiyas Air Jet for Special Application | ||
You can click here to find out how we used air gauges to measure connecting rods, which are commonly used in the automotive industry. Below you can also find a summary of the different ways air gauges are used for measurement.
Air Gauge Lifetime
Air gauges can be manufactured with various materials, with or without coating, depending on application and number of cycles required. Even if air measurement is a non-contact measuring method, air gages are subject to wear due to:
- Air abrasion
- Introduction of the parts into the air gauge
Worn air gauges will affect repeatability of the measurement. The most sensitive air gauges are those with air jets close to the edge because the air jets are in the contact zone.
Air Units & Modules
Here at LFC we have a wide range of air measurement solutions. You can consult us for the most basic setup to the most complex upgrade for your air gauging system. Our display units, software and modules are designed to be compatible with all air gauges on the market, regardless of the supplier. Our solutions allow for digitization and automation, providing advanced features that are not available on traditional air columns. With direct digital display of values, data export capabilities, and improved decision-making and monitoring capabilities, you can significantly enhance the accuracy and efficiency of your control stations
Here's a list of things that we can do for you:
- Digital reading up to 0.01 micron
- Easy to set-up
- Display unit and PC
- Maintenance free
- Suitable for automation
- Export, data traceability
- Compatible with all air gages
- Customized solution
- PLC compatible
D70A display unit is a smart, user-friendly device featuring a touch screen display. It offers the flexibility to connect one or two air gauges, depending on the model, while offering advanced features. You can see below for an example of how you can make use of the D70A to set up a simple air gauging system.
D400S is an advanced and multifunctional touchscreen display unit with the ability to connect to 32 air gauges via MB-AG modules. One single compact unit can replace tens of traditional air columns. The many possibilities of integration and connection will make it the nerve center of your control stations. Take a look at the diagram below to discover the versatility of the D400S.
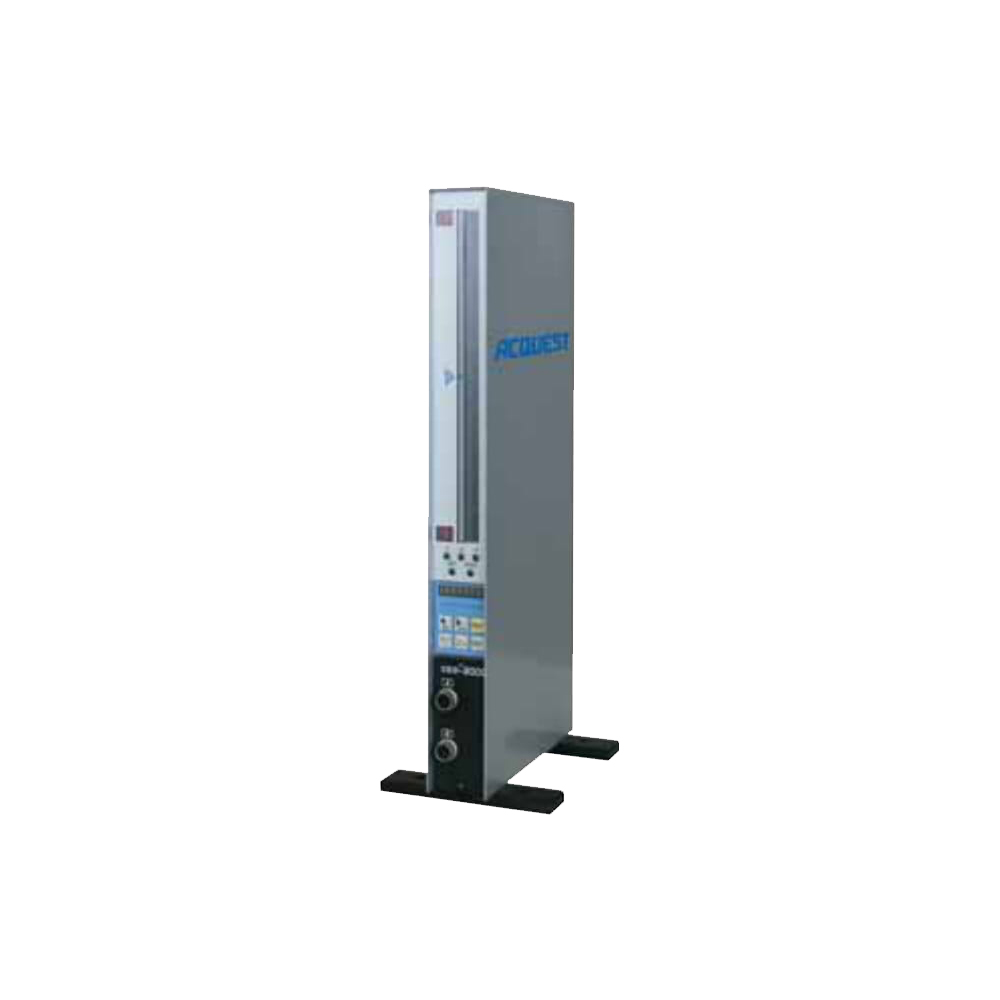
The Series CAG-3000 column type air gauge, micrometer display is a precision, non-contact measuring instrument when combined with air probe sensor. Acquest CAG 3000 performs instant, convenient, and precise dimensional analysis on components. Pass/Fail feedback is instant with the integral easy view three-color LED bar-graph display. Column displays can also be conveniently daisy-chained with additional units to allow quick inspections of multiple dimensions with various sensors. All CAG-3000’s come standard with RS-232 serial communications for data analysis on PLC’s. An Excel spreadsheet program is available for download for free that allows communication with up to 5 units simultaneously.
How to use air gauges?
1. Air Supply
Before you start to make any measurements, it is important to ensure that the air supply is highly stable. A stable air supply, both in pressure and flow, is a critical component that directly influences the final measurement result. To ensure consistency, it is essential to use precision air preparation equipment. Using only a standard regulator can lead to unstable measurements. The air must be filtered and dry to avoid corrosion at the level of the air gauge. The output air pressure must be 3 bar, with a cautionary note that pressure above 5 bar can damage our units and low pressure will affect accuracy. Diameter and length of the pneumatic tubes are also important, unsuitable tubes can lead to slow reaction time and unstable value displayed. This is done by using a precision regulator. Using poor air regulators might lead to unstable measurements.
2. Setting masters
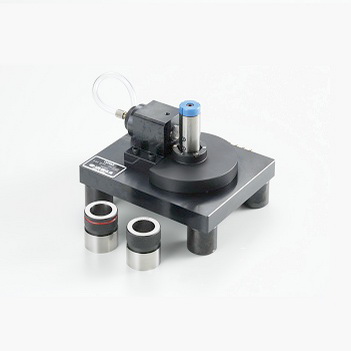
Setting masters are used in the beginning of the measuring process with air gauges. They help to set the minimum and maximum measuring range on the air units. It is recommended to use setting masters which are between 10-15 times more accurate than the tolerance interval. High quality masters are important to achieve consistent measuring results. Ojiyas setting master ring and plugs below are good examples of good setting masters.
 |
 |
3. Setting Air Units
After setting the air units, the air gauges are ready to make measurements on the workpiece.
LFC is the authorized distributor of Ojiyas air gauges, Acquest air micrometer and Sylvac measuring equipment in Singapore and Indonesia. Contact us if you need help with your air gauging set up.


