What is Car Detailing?
Car detailing keeps the vehicle in its best possible cosmetic condition. This is achieved by removing both visible and invisible contaminants from the vehicle's interior, and polishing the exterior to its original blemish-free finish. The most basic detail options include an exterior wash and wax, interior vacuuming, window cleaning and surface polishing. Car detailing as it relates to paint thickness measurement is the systematic cleaning, rejuvenating, and protecting of the exterior painted surfaces of a vehicle. The primary purpose for paint detailing is to retain the appearance of newer vehicles or to revitalize older neglected vehicles
Cleaning is a preparatory step intended to remove dirt, dust, and other loose contaminants in order to allow full inspection of current paint conditions. Rejuvenation refers to the processes used to return a vehicle to its original showroom condition. The extent of rejuvenation is dependent on the customer’s expectations. Protection refers to the maintenance processes such as waxing that are used to keep the vehicle looking new for as long as possible after detailing.
 |
| Photo by Orhun Rüzgar ÖZ from Pexels |
Simple washing and waxing will not remove many types of surface paint damage; a rejuvenation step (polishing with an orbital or a more effective high speed polisher) is added before the waxing step. When rejuvenation is required, detailers often polish the top clear coat layer of automotive paints to remove surface damage such as fine scratches, scuffs, swirl marks, oxidation, stains, paint overspray, tar, tree sap, acid rain, or water spots. This polishing process is often referred to as finessing.
Extensive paint problems may require the use of several sanding and buffing steps to bring the paint back closer to its original beauty. Automotive manufacturers typically use one of two main types of paint systems in their vehicles. The most common used today is a clear coat system in which a thin layer of color is applied, followed by multiple layers of clear non-pigmented paint.
Measurement Principles for Paint/Coating Thickness Gauges
Paint thickness over exterior automotive materials is best measured with hand-held, electronic instruments. Three types are available and selection depends upon the type of coating, the material being painted, and the size and shape of the part. These instruments use magnetic, eddy current, or ultrasonic measuring techniques.
Magnetic Principle for Steel
Since steel is magnetic, paint thickness over steel is measured with magnetic (ferrous) gages employing mechanical or electronic operation.
 |
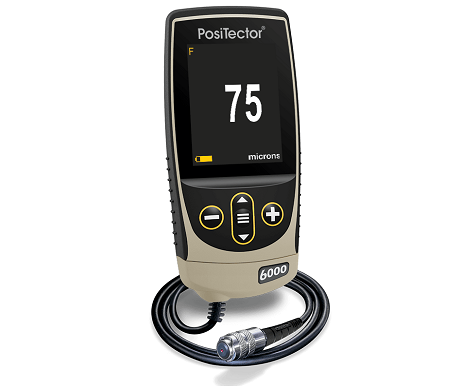
| PosiTector 6000 FN |
Mechanical gages use a permanent magnet, a calibrated spring, and a graduated scale. By measuring the force required to pull the magnet off the coated surface, a thickness measurement can be determined. Low cost magnetic pull-off gages provide coarse measurements useful for detecting bondo or other fillers beneath the paint. Their use by detailers is limited and the accuracy is typically ±5%.
Electronic magnetic gages are much more popular in the detailing industry. They use a constant pressure probe to provide consistent readings that are not influenced by different operators. Readings are shown on a liquid crystal display (LCD). While most have basic operation, some have options to store measurement results, perform instant analysis of readings, and output results to a printer or computer for further examination. Accuracy is typically between ±1 to 3%.
Eddy Current Principle for Aluminum
Paint thickness over all other metals such as aluminum is measured using an eddy current technique. When the instrument’s probe is brought near a metal (conductive) surface, a coil within the probe generates an alternating magnetic field that sets up eddy currents on the metal’s surface. These eddy currents create their own opposing electromagnetic field that can be sensed by a second, adjacent coil.
 |
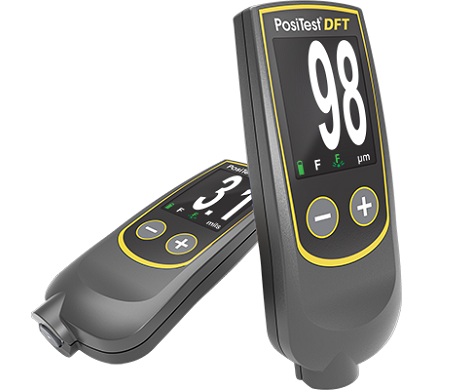
| PosiTest DFT |
Eddy current (non-ferrous) coating thickness gages look and operate like electronic magnetic gages. They also use a constant pressure probe and display results on an LCD with options to print stored measurement results.
It is relatively uncommon to find instruments that operate only with the eddy current principle in this industry. It is more likely to find gages that incorporate BOTH magnetic and eddy current principles into one unit. Some simplify the task of measuring by switching automatically from one principle of operation to the other, depending upon the substrate.
Ultrasonic Principle for Plastic
An ultrasonic technique is used when measuring the thickness of paint over non-metal substrates such as plastic and fiberglass. The probe of the instrument contains an ultrasonic transducer that sends a pulse through the coating. The pulse reflects back from the substrate to the transducer and is converted into a high frequency electrical signal that is analyzed to determine coating thickness. In some circumstances, individual layers in a multi-layer system can be measured.
 |
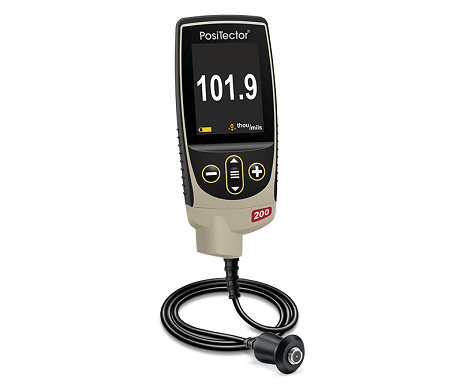
| DeFelsko PosiTector 200 Coating Thickness Gauge for Plastics |
Measuring Paint Thickness and Clear Coats
To ensure consumer value and maintain profitability, there are two main considerations when justifying equipment and processes involved in the detailing process. Any added cost must result in improvements in either efficiency or effectiveness. While it could be argued that a detailer’s ability to take quick readings with a paint thickness gauge in order to determine the remaining paint thickness is an efficiency benefit, the primary benefit is the increase in effectiveness.
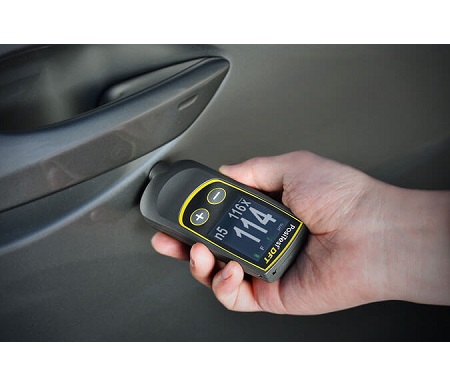
When the need to polish (sand and buff) has been identified it is important to evaluate the paint in surrounding areas. Most factory paint jobs seem to range from 4–7 mils (100–180 microns). Thinner readings indicate that the clear coat is almost entirely removed or in the case of single-stage systems that the primer is about to show through. As represented in the photo above, thicker readings are often an indication that repainting has occurred. When repainting is detected, the operator has a difficult task in evaluating the suitability (thickness) of the top layer of paint for buffing. No matter how careful the operator, buffing or polishing on thin coatings risk paint damage to the vehicle. When detailing thin coatings or unknown paint layer thickness, an alternative system such as hand polishing may be the only safe option.
After determining the paint system used on the vehicle and thus the expected paint thickness, it is important to determine the actual paint thickness. Even an experienced detailer finds it difficult to determine paint thickness, especially clear coat, through visual inspection. As thinner, more scratch resistant clear coats such as nanotechnology become more prevalent, it will become more critical to use high resolution electronic paint thickness gauge to determine how much paint thickness is being removed while finessing.
Because of the potential for removing the majority of the UV blockers, most auto manufacturers recommend that a maximum of 0.3 mils (8 microns) clear coat be removed as prevention from UV damage to underlying paint layers. In a worst-case scenario with a single stage paint process, buffing down to the primer may result in a costly trip to the paint booth.
 |
| Photo by Tom Fisk from Pexels |
Also consider that paint damage may not visually appear immediately. When too much topcoat is removed, premature failures such as fading or delamination may occur. Failures have the potential for lawsuits, unhappy customers, and loss of reputation. Such risks can be alleviated by monitoring and minimizing the amount of topcoat removed, which is best done through quick and easy measurements with an electronic paint gauge.
Significant damage below the top painted surface may include deep scratches, etching, staining, and heavy oxidation. Just as simple washing and waxing will not remove some top layer paint damage, rejuvenation through sanding and buffing may not be adequate for removing deeper paint damage. It is therefore important to recognize the limitations before too much paint has been removed.
Paint/Coating Thickness Gauge for Cars
Traditionally, steel was used exclusively to manufacture automobile exteriors because it balanced cost with strength and machinability. Now aluminum is used for some components as manufacturers look for ways to reduce weight without sacrificing safety. Both these metals require painting for corrosion protection and cosmetic appeal.
Bumpers and fascia systems are commonly made of plastic and composite materials. Lightweight, they allow designers the freedom to create innovative concepts. While metal panels are easily dented by minor impacts, plastic body panels are more resistant to damage.
On some recently manufactured cars and trucks it is not uncommon to find all three materials – doors and fenders made of steel, roofs and hoods made of aluminum, bumpers and mirrors made of plastic.
DeFelsko manufactures hand-held, non-destructive paint thickness gages that are ideal for use by automotive paint detailers. They enable full service detailers to quantitatively measure and control the amount of clear coat removed when sanding and buffing automotive paints.
DeFelsko provides three options to this industry.
PosiTest DFT
The PosiTest DFT is the simple, economical, and most common solution for measuring exterior metal automobile panels. The PosiTest DFT series of gauges measure coatings up to 40 mils (1000 microns) making them ideal for non-destructive measurement of automotive paint thickness on a variety of metals.
a. The PosiTest DFT-Ferrous is ideal for steel panels.
b. The PosiTest DFT-Combo for both steel and aluminum panels.
With ±3% accuracy and a 0.1 mil (2 micron) resolution, the PosiTest DFT provides the capability to measure the amount of paint removed while sanding and buffing.
Approved by major Dealer Equipment Programs such as Toyota, GM, BMW, Nissan, Volvo, Mercedes-Benz, Hyundai, and Volkswagen.
PosiTector 6000
The PosiTector 6000 provides similar measurement capabilities with higher accuracy and resolution. Rugged, versatile gage for total coating thickness measurement on metal panels. Optional features include interchangeable probes, on-screen statistics, printer output, and downloading readings to a computer.
a. The PosiTector 6000 F1 for steel panels.
b. The PosiTector 6000 FN1 for both steel and aluminum panels.
The PosiTector 6000 series of gauges provide similar measurement capabilities with higher accuracy and resolution. Various probes are available with measuring ranges up to 25 or 500 mils (625 µm–13mm) and a selection of probes to measure various shapes. With ±1% accuracy and a 0.05 mil (1 micron) resolution, these are among the most accurate instruments available. Additional features such as memory and print capability are also valuable to customers with a desire to log measurement results. Based on the intended application, customized gauges and probes are available that are specifically designed for measuring on steel, aluminum, or both types of metal. These quality instruments are used in all aspects of automobile production, fleet inspection, and remarketing.
PosiTector 200
The PosiTector 200 has the unique ability to measure over non-metals such as automotive fiberglass or plastic.
a. The PosiTector 200 B1 is the economical and most common solution for measuring the TOTAL thickness of the coating system.
b. The PosiTector 200 B3 is capable of measuring both TOTAL coating thickness AND up to 3 individual layer thicknesses in a multi-layer system.
The PosiTector 200 ultrasonic gauge measures over non-metals such as fiberglass panels, plastic bumpers, and interior components. It has ±3% accuracy and a 0.1 mil (2 micron) resolution. A simple gauge menu adjustment enables the operator to view the remaining amount of clear coat while polishing.
Approved for use in BMW’s dealer equipment program.
How to Measure Paint Thickness on Automobiles
Magnetic and Eddy Current Paint Thickness Gages
- Turn Gage on.
- Place the probe FLAT on the surface to be measured. HOLD STEADY. When a valid measurement is calculated, the Gage BEEPS and the measurement is displayed.
- Lift probe at least 2 inches (5cm) from the surface between measurements—OR—leave probe on the surface in the same location for continuous measurements every 2 seconds. Do not drag the probe sideways on the surface.
 |
To verify gage accuracy, follow these simple steps:
- Measure an uncoated part. This quick zero-check determines if a calibration adjustment is needed for the particular object being measured.
- Next, lay the included plastic shims onto the bare surface and measure them individually to ensure the Gage can measure these known thicknesses within tolerance.
- Coating Thickness Standards are available with greater accuracy.
Ultrasonic Paint Thickness Gages
Ultrasonic measurement of coating thickness works by sending an ultrasonic vibration into a coating using a probe with the assistance of a couplant applied to the surface. A bottle of a common glycol gel is included with every instrument. Alternatively, a drop of water can serve as couplant on smooth, horizontal surfaces.
After a drop of couplant has been applied to the surface of the coated part, the probe is placed flat on the surface. Pressing down initiates a measurement. Lifting the probe when a double beep is heard or when the green indicator light blinks holds the last measurement on the LCD. A second reading may be taken at the same spot by continuing to hold the probe down on the surface. When finished, wipe the probe and the surface clean with a tissue or soft cloth.
 |
| Measurement with an ultrasonic paint thickness probe. Place the thumb and index fingerlow on the sliding sleeve. Press down to effect a measurement. |
To verify gage accuracy, follow these simple steps:
- Using the ZERO menu option, the probe must be periodically zeroed to compensate for both extreme temperature and probe wear effects. (NOTE: Unlike a magnetic or eddy current gage where zeroing is accomplished by measuring an uncoated piece of metal, zeroing an ultrasonic gage is accomplished by taking a measurement while the probe is held in the air.)
- Next, lay the included plastic shims onto a hard, smooth surface and measure them individually to ensure the Gage can measure these known thicknesses within tolerance.
- Calibration Standards are available with greater accuracy.
LFC is the authorized distributor for DeFelsko in Singapore. Contact us if you wish to make an appointment to test the coating thickness gauges.
References:
1. How to use paint thickness gauges for better automotive detailing: Resources: Defelsko. DeFelsko Inspection Instruments. (n.d.). Retrieved December 1, 2021, from https://www.defelsko.com/resources/how-to-use-paint-thickness-gauges-for-better-automotive-detailing.
2. Wikimedia Foundation. (2021, November 30). Auto detailing. Wikipedia. Retrieved December 1, 2021, from https://en.wikipedia.org/wiki/Auto_detailing.
3. Should I install ceramic coating on new cars? Ceramic Pro. (2021, July 23). Retrieved December 1, 2021, from https://ceramicpro.com/should-i-install-ceramic-coating-on-new-cars/.
4. What is car detailing? The Beginners Guide to professional car detailing. Mobile Tech RX. (2020, October 6). Retrieved December 1, 2021, from https://www.mobiletechrx.com/resources/beginners-guide-professional-car-detailing/.
5. Petar. (2021, July 18). How to measure car paint depth using a paint thickness gauge. Car Detailing Planet. Retrieved December 1, 2021, from https://cardetailingplanet.com/how-to-measure-car-paint-depth-using-a-paint-thickness-gauge/.


